Okay, so sometimes you have this project looming in front of you which you are worried may be biting off more than you can chew. I certainly thought that was the case as I started into painting Alexa's new (to her and us) furniture. Mark and Holly were gracious enough to pass along the crib that they had used for Layton, but Kelsey decided that she would like the furniture to be black. So after some excellent tutoring and several trips around all of the OKC metro to get supplies, I was reluctantly ready. Here are some pictures of what things looked like before the painting began:
This is the changing table - one reason I was totally scared about this project was the number of spindles I would get to deal with. Sanding those seemed like a total nightmare. The crib was in pieces already, but I did take the hardware off of each of the pieces so that I could paint everything:
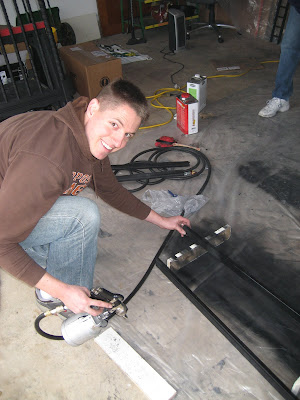
One really cold day I hung out in the garage with some lacquer thinner to clean up the furniture and then the weather got really cold, so I decided that I would wait until some warmer days. When Eddy volunteered to help out with the priming, I decided that I needed to get started on the project. So, with all kinds of borrowed goods from two very thoughtful friends, we dove into the project headfirst. It started off alright, but the sprayer just didn't seem to be coating things too well. So, being the incredible bright person that I am, I decided to read the instructions after lunch (found them online) for the sprayer and after a bit of adjustment, we were off and spraying on the second coat. Catch us in some of the action here:
Here is what things looked like after the second coat of primer. What you can't see is that Eddy's fingers are covered with primer, since he was good enough to hold the pieces for me as I painted. I managed to not even get kicked out of the family!
Look at that guy! Note the flammable liquids in the background and the mess that I am making. What you can't see is the coating of black paint in my lungs! With Eddy's help we got everything coated in two layers of primer and then sanded. Then I had to wait a couple days until MLK day to get the final layer painted.
There is a layer of black over spray on about everything. Nothing a little air can't clean out of the garage. What I didn't know when I started this project was that I would also be cleaning out the garage. I moved everything out and got it all cleaned up. After I finished up, I think that we might have decided that it is clean enough to be Alexa's room.
Here are some shots of the finished product (the changing table is assembled, the crib has yet to be assembled, since we are waiting until there is room to assemble it in Alexa's room). We will take better pictures later, but this is good enough for now:
Hurray for a completed project (or nearly)! If you are still reading this post, my lesson learned is that next time I will completely cover the garage with plastic. It is cheap and a lot easier to clean up than moving everything out of the garage. I promise that not all posts from me will actually be this long!


It's a bit hard to tell what's what, what's up and what's down, since I wasn't there to hear any explanations. But, from what I can tell (and being a proud grandma-to-be), Alexa looks to be a cutie. :-) CK, make sure you measure her nose once she's born. Tee hee!
ReplyDeleteOops! My earlier post about what's what and all was supposed to go along with the ultrasound post. Obviously this is new to me too! As far as the painting adventure....WELL DONE!!!! Can't wait to see it up close in just a few days. :-)
ReplyDelete